
There are many reasons why you should consider to use virtualization in your environment. This tutorial will show you how to easily deploy virtual machines for different services on your machine.
Note: This guide requires advanced linux knowledge and is not meant for beginners.
Here are some of them:
- server consolidation – virtualization can help you conserve physical space. In traditional data center environments it is common to dedicate each server to a single application. This leaves most computers vastly underused. Virtualization enables you to run more workloads on a single server, which reduces the number of physical machines in your environment.
- reduced cost – hardware is most often the highest cost in a data center. Because virtualization reduces the need for physical machines, the cost also goes down. But the cost goes well beyond that of hardware – software licensing savings, power and cooling cost reduction, improved user accessibility and performance are also some of the ways to reduce your cost.
- increased uptime – VMware offers a number of advanced features that are not available on physical servers, which helps with business continuity and increased uptime. Such capabilities are live migration, storage migration, fault tolerance, high availability, etc. These technologies keep virtual machines running or give them the ability to quickly recover from unplanned outages. The ability to quickly and easily move a virtual machine from one server to another is perhaps one of the greatest single benefits of virtualization with far-reaching uses.
- faster server provisioning – with Vmware, you can quickly clone an image, master template, or existing virtual machine to get a server up and running within minutes. This is in contrast to physical servers, which usually require hours for installation.
- easier backups – with virtualization, you can create full backups of your virtual machines within minutes. These backups can be moved from one server to another and redeployed easier and faster. You can also take a snapshot of a virtual machine, which is a state of a virtual machine at a specific point in time.
Today we’ll talk about this topic by using libvirtd / KVM on Linux, an easy introduction how to get rid of risky service management on a RHEL based single machine.
So what’s libvirtd?
libvirt is an open-source API, provided by Red Hat Inc. , daemon and management tool for managing platform virtualization. It can be used to manage KVM, Xen, VMware ESXi, QEMU and other virtualization technologies. These APIs are widely used in the orchestration layer of hypervisors in the development of a cloud-based solution.
In the today’s example we’ll use QEMU/KVM using libvirtd on Fedora 31 Server.
Hardware details of the machine:
CPU:
AMD Ryzen R7 1700 Eight-Core
Motherboard:
- ASRock X470 Rack providing IPMI
RAM:
- 4x 16GB Samsung ECC 2666MHz
Disk:
- 4x 4TB HGST MegaScale SATA HDD
- 1x 1TB Crucial P1 NVMe SSD
- 1x 256GB Samsung SM951 NVMe SSD
Because of the use of bleeding edge hardware, we need to user a proper Kernel to provide hardware support.
That’s the reason why we use Fedora 31 instead of Red Hat Enterprise Linux, or CentOS in this article.
Getting started..
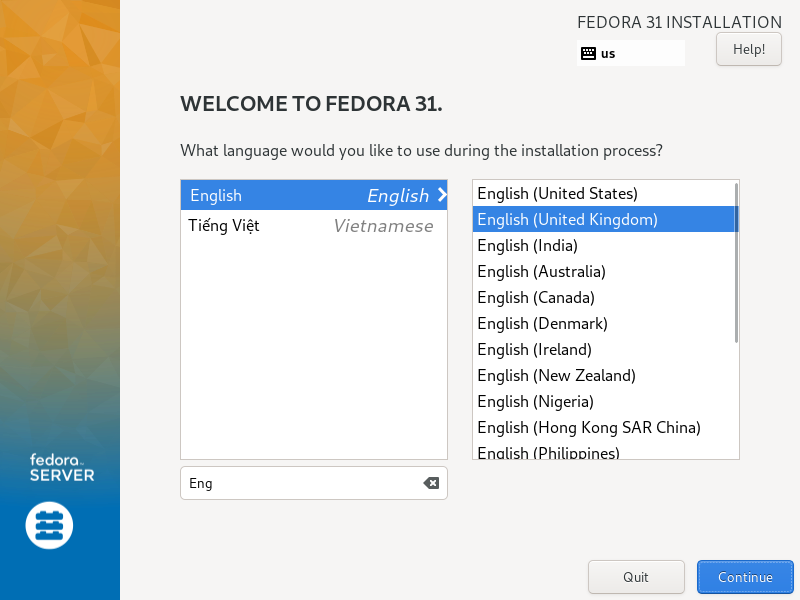
First you need to download the latest Fedora 31 ISO for your architecture, in this case we use an amd64 architecture.
The latest releases can be found right here, available for download.
Note: In order to reduce the amount of data to be downloaded, we recommend the use of the netinst images, because required packages will be downloaded automatically during the installation process.
Now you choose a proper way to install the image to your target machine.
I have set up Fedora 31 using IPMI, but most people are not able to access an IPMI ready system because of higher costs.
In this case you will require an USB device of your choice.
After having downloaded the ISO file, and inserted the USB device, check out in the terminal using
$ lsblk
to check the descriptor of your device.
In this case we suppose, your USB device is /dev/sdb/
We run
$ sudo dd if=Fedora-Server-netinst-x86_64-31-1.9.iso of=/dev/sdb bs=32M && sync
After completing the dd process you are ready to install the system, it should be quite easy, and will not be part of this article.
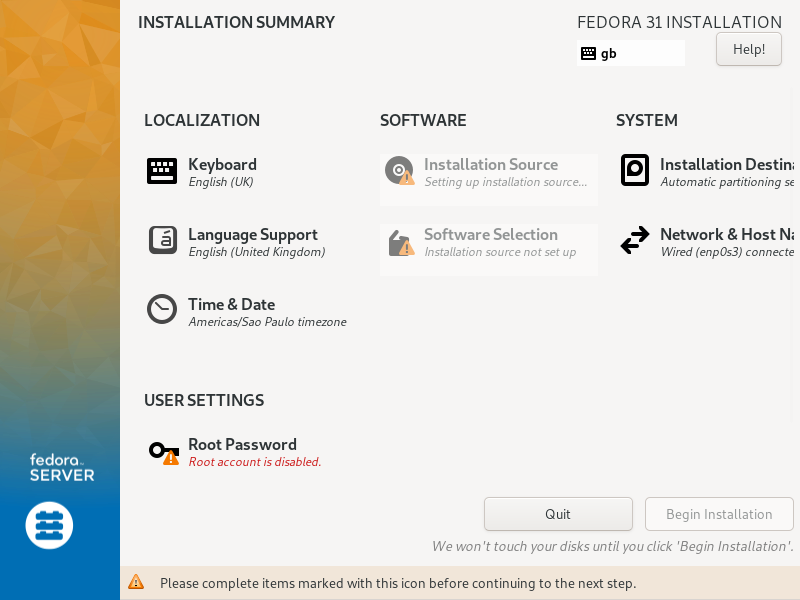
If you experience trouble during the installation process, please retrieve the official installation guide.
After having installed Fedora we’ll use a package called Cockpit, to simply the management of virtual machines.
It also allows a well designed Web GUI even for phones and other mobile devices.
Post installation
After having set up your account credentials and everything else, you are ready to start Fedora.
After the boot, you will find yourself in this screen.
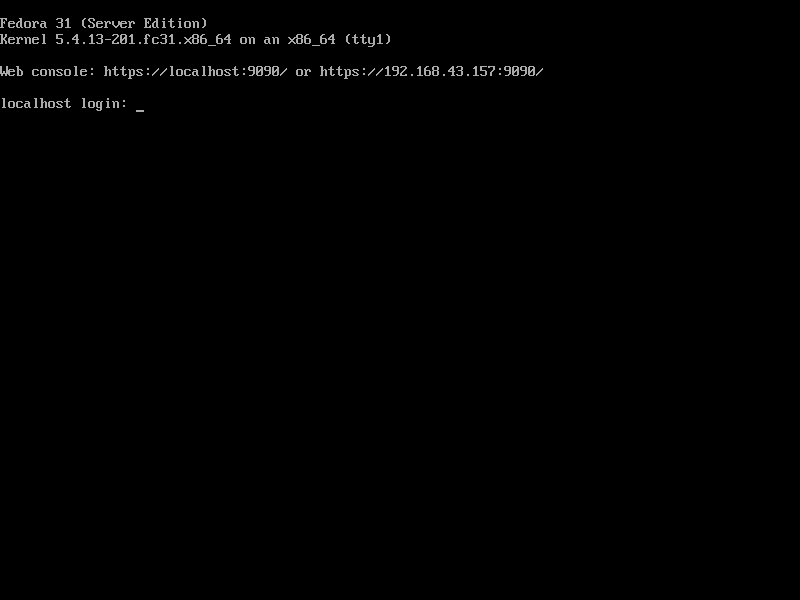
Fedora offers by default the Cockpit Web GUI, but we would like to extend it to provide the management tools, we need, for virtual machines using libvirtd.
Installing software
The required software prerequisites are libvirtd, cockpit and cockpit-machines. To install them on Fedora 31, run the following command from a terminal using sudo:
$ sudo yum install libvirt cockpit cockpit-machines
Cockpit is also included as part of the “Headless Management” package group. This group is useful for a Fedora based server that you only access through a network. In that case, to install it, use this command:
$ sudo yum groupinstall "Headless Management"
Enabling services
After everything is done, the services need to be enabled to start automatically after reboot.
$ sudo systemctl enable libvirtd --now
$ sudo systemctl enable cockpit.socket --now
To check, if everything is running fine, run the following commands, in order to confirm.
$ sudo systemctl status libvirtd
$ sudo systemctl status cockpit.socket
Now you should be able to access the web interface, using the information shown on the screen.
Deploying virtual machines
You can deploy virtual machines using the interface, but you will have to perform the installation process manually each time.
Let’s take a quick look.
Login, using your account credentials.

Select Virtual Machines and then select Create VM to build a new box.
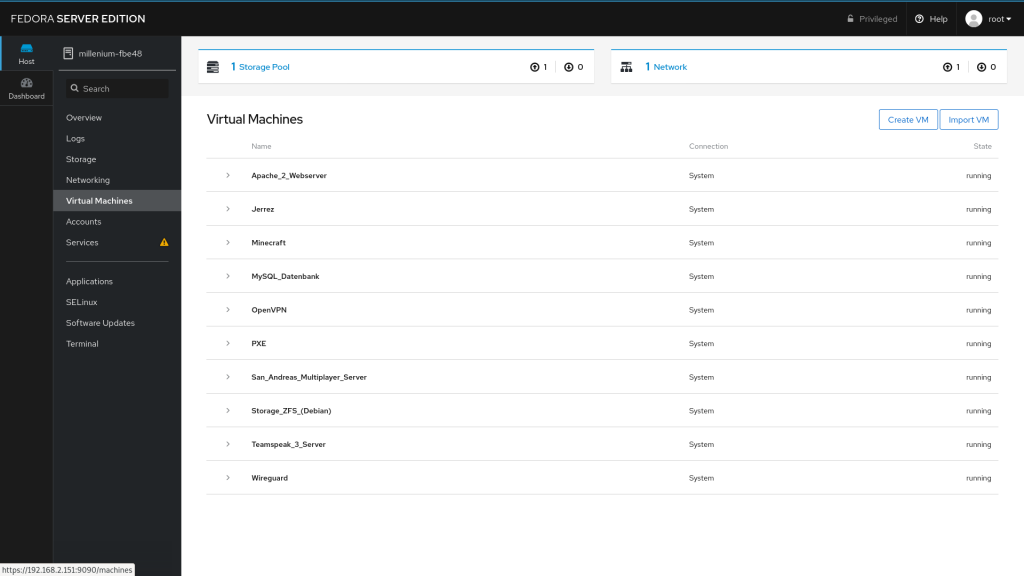
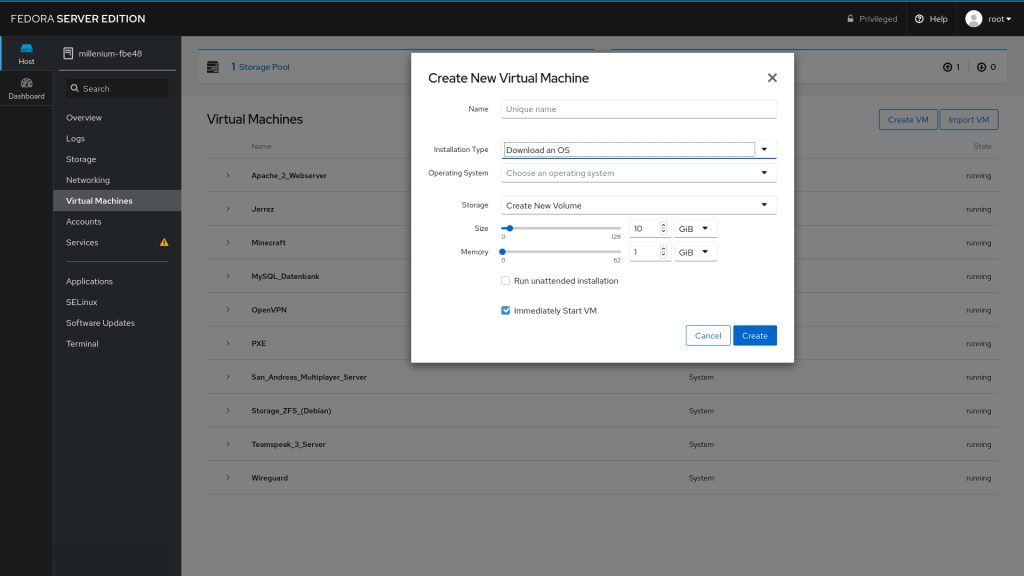
There are a few options in this case, if you want to install machines using the GUI.
- Download an OS using Cockpit’s built in library
- Use install media already downloaded on the system you’re managing
- Point to a URL for an OS installation tree
- Boot media over the network via the PXE protocol
This procedure can also be found right here.
Providing pre-built Virtual Machines using virt-builder
We’d like to go a more comfortable way.
We’ll let someone do the work for us according to our requirements.
Login into your system using the terminal and we’ll have to install the following packages, in order to be able to use pre-built systems.
$ sudo yum install libguestfs-tools libguestfs
libguestfs is a C library and a set of tools for accessing and modifying virtual disk images used in platform virtualization. The tools can be used for viewing and editing virtual machines (VMs) managed by libvirt and files inside VMs, scripting changes to VMs, creating VMs, and much else besides.
Virt-builder is a tool for quickly building new virtual machines. You can build a variety of VMs for local or cloud use, usually within a few minutes or less.
Post Installation
We can list all the current available virtual systems provided by these packages, using:
$ virt-builder --list
An example output:
$ debian-9                 x86_64     Debian 9 (stretch)
fedora-26                x86_64     Fedora® 26 Server
fedora-27                x86_64     Fedora® 27 Server
fedora-28                x86_64     Fedora® 28 Server
fedora-29                x86_64     Fedora® 29 Server
fedora-30                x86_64     Fedora® 30 Server
fedora-31                x86_64     Fedora® 31 Server
freebsd-11.1             x86_64     FreeBSD 11.1
scientificlinux-6        x86_64     Scientific Linux 6.5
ubuntu-10.04             x86_64     Ubuntu 10.04 (Lucid)
ubuntu-12.04             x86_64     Ubuntu 12.04 (Precise)
ubuntu-14.04             x86_64     Ubuntu 14.04 (Trusty)
ubuntu-16.04             x86_64     Ubuntu 16.04 (Xenial)
ubuntu-18.04             x86_64     Ubuntu 18.04 (bionic)
fedora-18                x86_64     Fedora® 18
fedora-19                x86_64     Fedora® 19
fedora-20                x86_64     Fedora® 20
So in order to get a working system, run
$ man virt-builder
By default, after the creation of such a virtual machine random hostnames, random passwords are being assigned to the machine.
Single Virtual Machine for each Service
Example:
We want a Debian 10 System, meant for a Teamspeak 3 Server. It should have the hostname “teamspeak”, and the root password should be teamspeak.
The root password should also be “teamspeak”.
We also want all packages to be up to date after the installation.
It’s HDD size should be, let’s say, 8GB. The command will look like this.
$ sudo virt-builder debian-10 -o teamspeak.qcow2 --format qcow2 --update --hostname teamspeak --root-password password:teamspeak --size 8G
The process will return the following output, so everything has worked!
[   0.8] Downloading: http://builder.libguestfs.org/debian-10.xz
[   1.2] Planning how to build this image
[   1.2] Uncompressing
[   4.1] Resizing (using virt-resize) to expand the disk to 8.0G
[  16.5] Opening the new disk
[  20.6] Setting a random seed
virt-builder: warning: random seed could not be set for this type of guest
[  20.6] Updating packages
[  72.2] Setting the hostname: teamspeak
[  73.1] Setting passwords
[  73.8] Finishing off
                   Output file: teamspeak_d10vm1.qcow2
                   Output size: 8.0G
                 Output format: qcow2
            Total usable space: 7.8G
                    Free space: 6.8G (86%)
Now we have to import the virtual machine in order to get it working.
We do so by accessing the web interface, logging in.
And we select “Virtual Machines”
Now we have to import the VM, so click the proper button “Import VM”
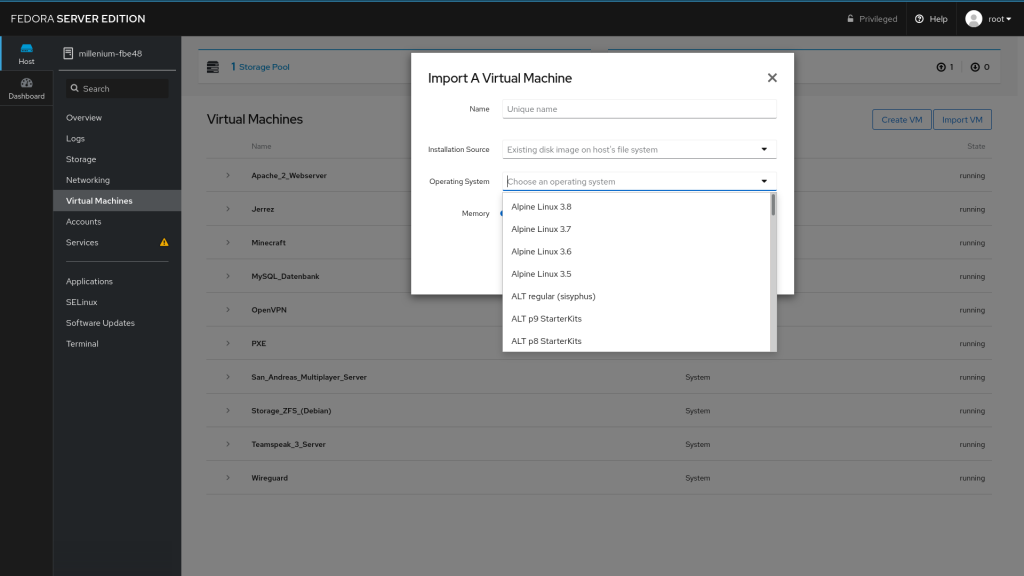
Now select the operating system you selected before, using virt-builder.
Later on, let the GUI know where you have installed the image file, using virt-builder.
Are you ready now?
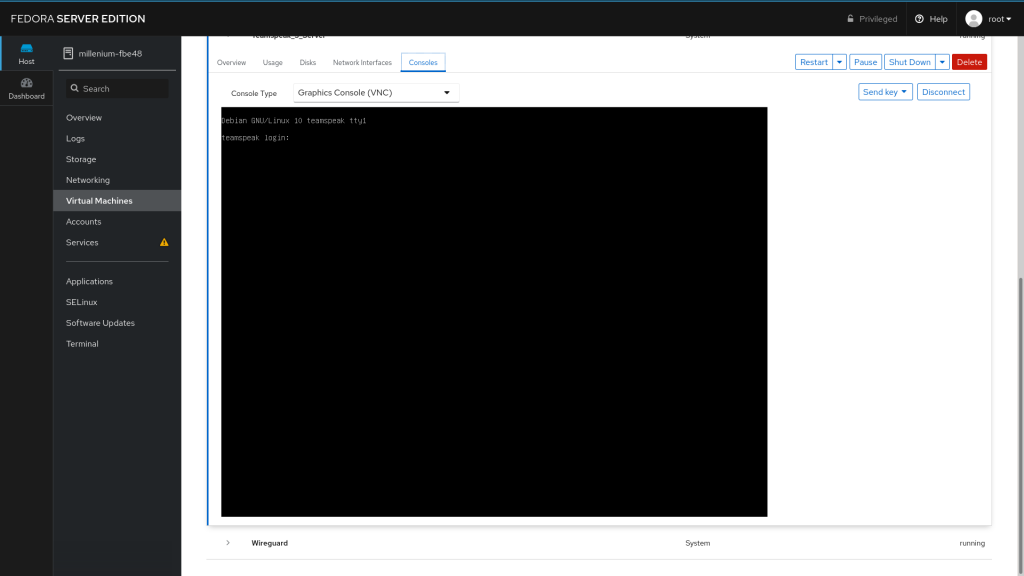
Now you can easily start the machine.
You can choose a lot of options in order to manage your machines, i would recommend the Web GUI instead of managing them using virsh (This will be part of the next article)
If you would like to customize your machines, you should create a bridged network device, and attach it to your machines, in order to get SSH access from the local network.
For now the work is done, and you can use your machine after clicking the “Console tab”.
There you can do everything you want it’s like an idependent system, very useful in order to run services in “containers” for security reasons.
But what if you want to create a storage VM, e.g. for ZFS or RAID applications?
I’ll answer this question as a port of an advanced libvirt tutorial, explaining things like PCIe pass-through, and nested Vt-d.
If you have any questions or suggestions feel free to comment!